
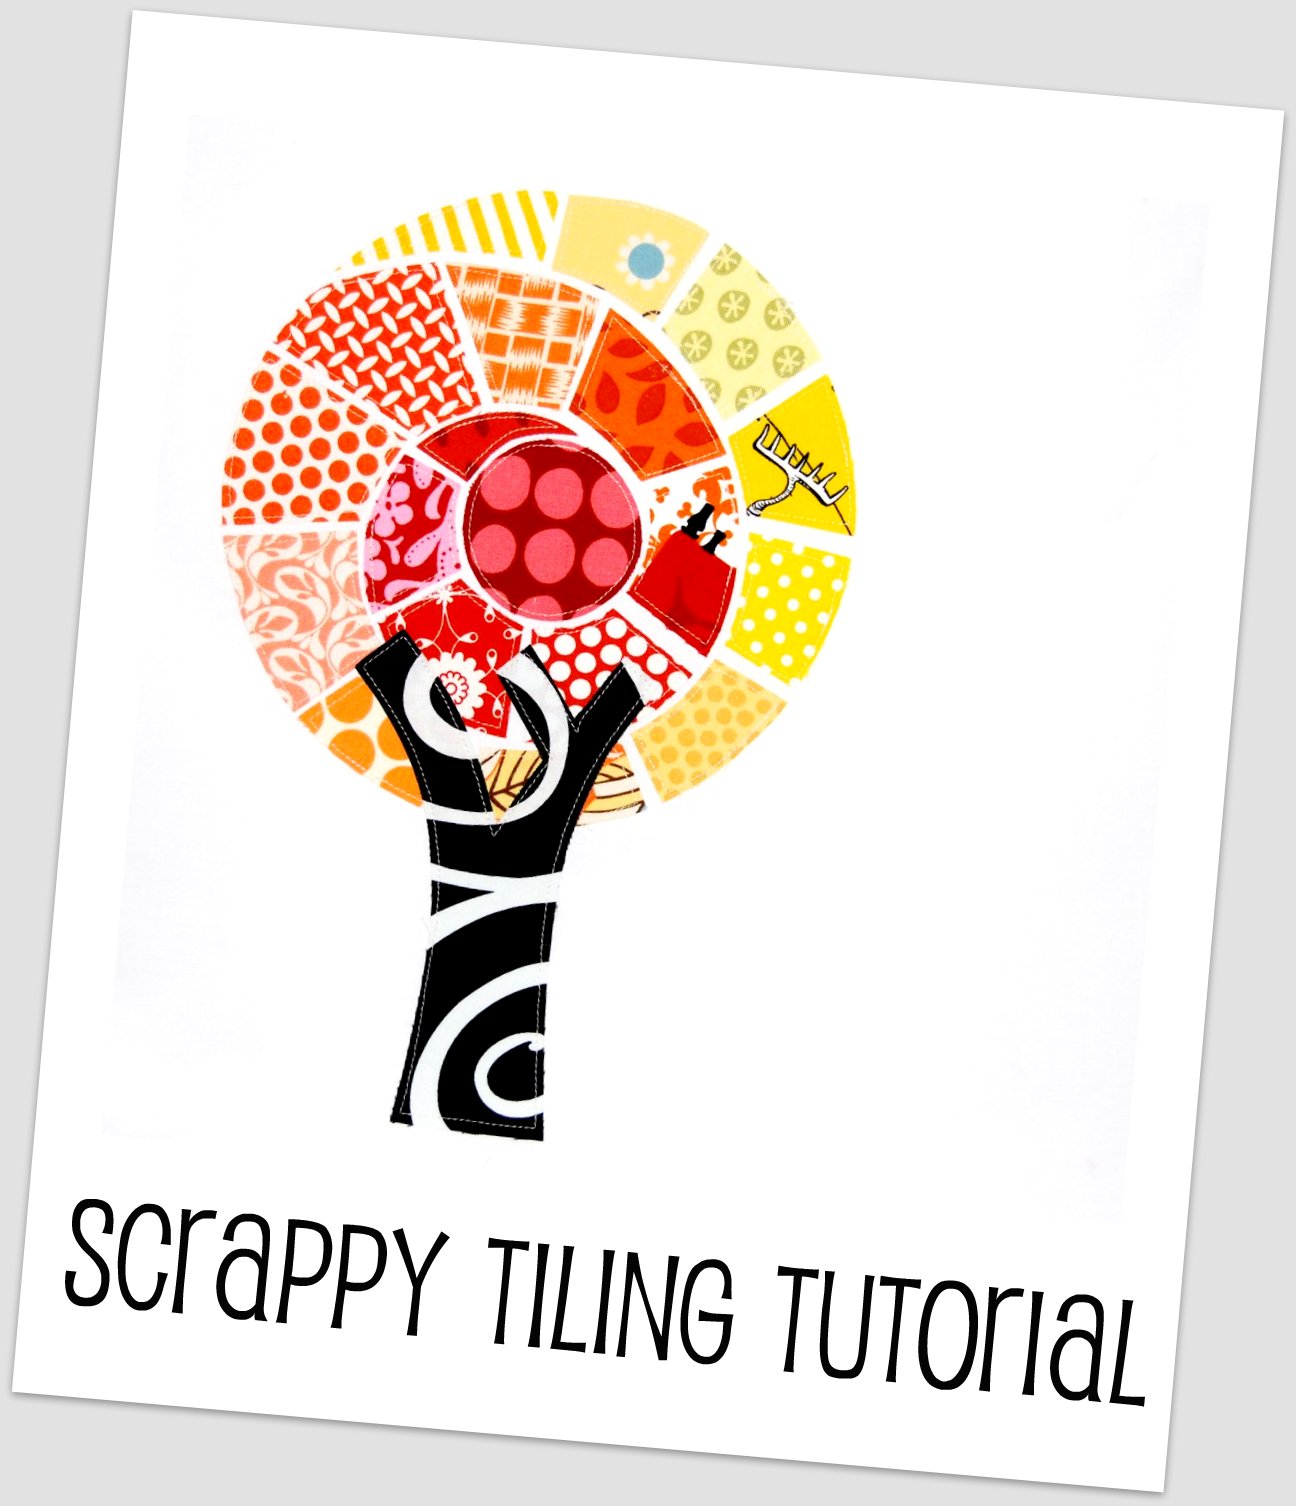
A few people asked how I made my rainbow tree block. To show you how, I have made another block and will take you through the process step by step. I will first mention that the idea for this process comes from the wonderful book The Tile Quilt Revival. In that book, the method takes longer and produces more formal and orderly designs. My method is quicker and easier and produces a more informal and scrappy look, hence the name scrappy tiling.
1. Draw the outlines of the key elements of your design on a piece of paper the same size as the finished block. Pin the background fabric onto the paper. Tape to a window if this helps you see the design on the paper. You will use the paper to align the details of your design.


3. Number the segments of your design and cut out. If the design is very complicated, cut out as you go so you do not lose track of where you are.


4. Fuse each piece of fusible webbing to the back of the pieces of fabric you have chosen for your design. Once fused, cut out the shape but take a slither off the edge of the paper. I don't mean an 1/8 or an inch, I mean a real slither, like a millimetre or two.


5. Place onto the background fabric leaving a small gap between each piece but do not fuse into place until the section you are working on is all in place and lined up. Remember you are going for a scrappy look here so don't worry about perfect lining up - for this job, perfection is not required.

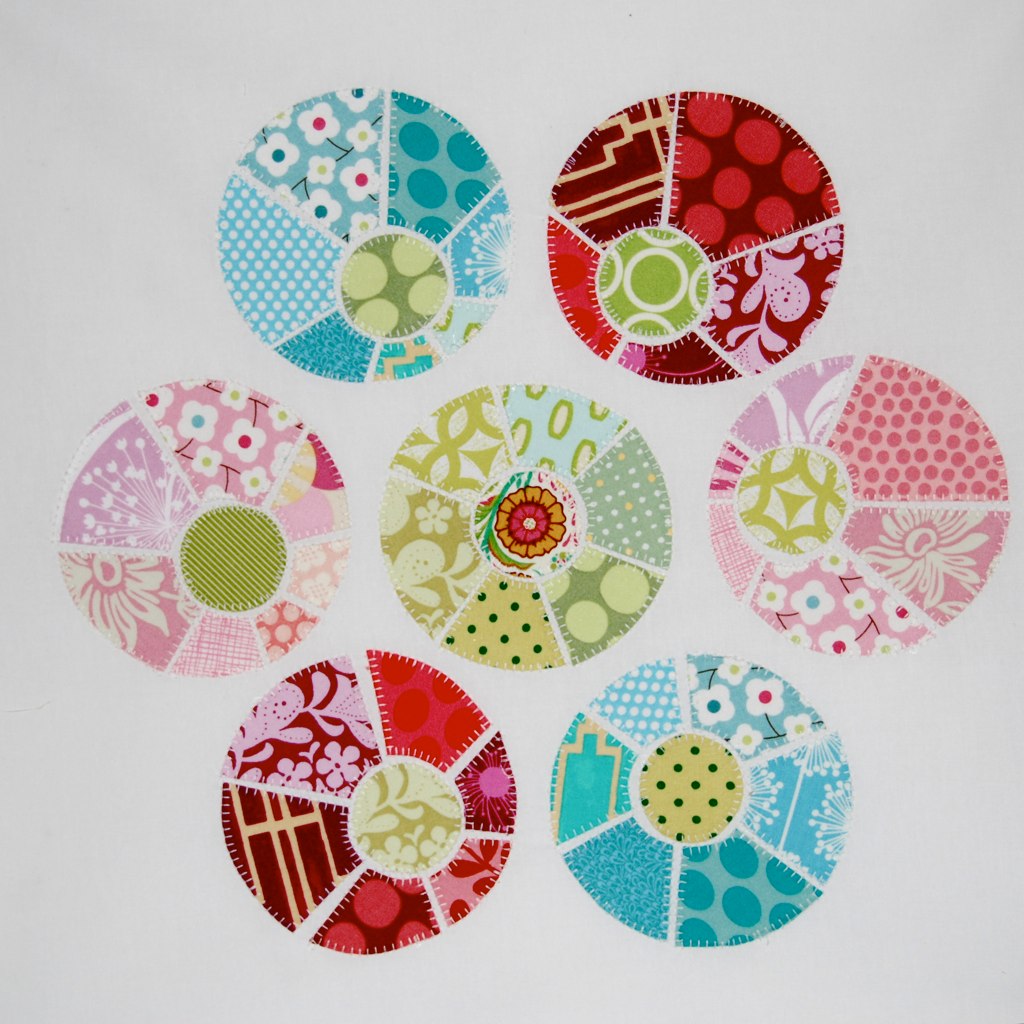
6. Once all pieces are lined up, fuse and then edge with the stitch of your choice. I chose blanket stitch on the flowers and straight stitch on the rainbow tree.
1. Draw the outlines of the key elements of your design on a piece of paper the same size as the finished block. Pin the background fabric onto the paper. Tape to a window if this helps you see the design on the paper. You will use the paper to align the details of your design.

2. Draw the details of your design onto fusible webbing such as Bondaweb or Steam-a-seam but remember that these images will come out in reverse on the final block.


4. Fuse each piece of fusible webbing to the back of the pieces of fabric you have chosen for your design. Once fused, cut out the shape but take a slither off the edge of the paper. I don't mean an 1/8 or an inch, I mean a real slither, like a millimetre or two.


5. Place onto the background fabric leaving a small gap between each piece but do not fuse into place until the section you are working on is all in place and lined up. Remember you are going for a scrappy look here so don't worry about perfect lining up - for this job, perfection is not required.

6. Once all pieces are lined up, fuse and then edge with the stitch of your choice. I chose blanket stitch on the flowers and straight stitch on the rainbow tree.
As ever, please let me know if you try this method, come back and ask me any questions and post pics in my Flickr group.
Yes, we all love Quick and Easy!
ReplyDeleteAnd another useful tutorial: thank you very much.
I'm certainly going to try this, because it looks really easy!
Thanks Lynne
I adore your new blog look and logo, love the fonts as well! The trees are fantastic, it would make a really cute fabric. I have to try this, so cute!
ReplyDeleteThank you for this tutorial and the nudge to get the book out and give this try!
ReplyDeleteWow. This is really cool.
ReplyDeletethanks for the tutorial
ReplyDeleteThis is exactly how I made my tile quilt. Easy and so much fun! Great tutorial Lynne!
ReplyDeleteCute! I'm going to try this sometime.
ReplyDeleteI'm feeling so lucky today... thank you for the great block!! :) ♥
ReplyDeleteI love double sided bondaweb or whatever you call it! I want to steal that blanket stitch you have on your machine, it makes this beautiful block even better!
ReplyDeleteoh yes oh yes oh yes ...
ReplyDeleteThank you so much for this tutorial. I love your tree, and now I love your flowers. And I want to make some of my own to love!
ReplyDeleteGreat idea for Tracey's block (I recognize the fabrics!), and thanks for sharing your method (as always...you're so generous Lynne).
ReplyDeleteThank you. This is great!
ReplyDeleteThanks for sharing I missed this post and had to come find it from flickr. You're just too quick!
ReplyDeleteI love the fact that perfection is not required and yet, the block turns out perfectly.
ReplyDeletethis is gorgeous! Love it!!! Thanks for the tute!
ReplyDeleteThis is amazing! Thank you for the quick tutorial! I hope to try this out soon!
ReplyDeletesurely, im gonna try this! thanks for sharing! so creative
ReplyDeleteSuper cute. I love anything scrappy!
ReplyDeleteits very clever, and cute :) thanks for the inspiration
ReplyDelete